Best DIY cluster lash extensions
DIY cluster lash extensions, also known as "flare" or "individual cluster" lashes, are a popular way to achieve a fuller and
more dramatic eyelash look without the need for professional salon application. These clusters consist of multiple lash hairs
bundled together, and they can be applied at home with the right tools and techniques. Here's a step-by-step guide to
achieve the best DIY cluster lash extensions:
Materials and Tools:
Cluster Lashes: You can purchase cluster lash kits from beauty supply stores or online. These kits contain pre-made lash clusters
in various lengths and styles.
Eyelash Adhesive: Use a high-quality, latex-free adhesive designed for eyelashes. Make sure it's suitable for cluster lashes.
Tweezers: Fine-point tweezers are essential for precise application.
Scissors: Small, sharp scissors can be used to trim lash clusters if necessary.
Makeup Remover: In case you need to fix any mistakes or remove lashes.
Cotton Swabs: To clean and adjust the lash line.
Step-by-Step Guide:
Prepare Your Natural Lashes:
Start with clean, makeup-free eyelashes. Remove any residual mascara, oil, or debris from your lashes using a gentle eye
makeup remover.
Choose Lash Clusters:
Select the appropriate lash clusters. You can choose different lengths and styles to create your desired look. For a more
natural look, go with shorter clusters toward the inner corner of your eye and longer ones toward the outer corner.
Apply Adhesive:
Dip the base of the cluster into the adhesive, ensuring you don't use too much glue. Let the glue become slightly tacky for
about 20-30 seconds. This step is crucial to ensure proper adhesion.
Placement with Tweezers:
Using tweezers, carefully place the lash cluster close to your natural lash line. You should attach them directly to your natural
lashes, not your eyelid. Start from the outer corner and work your way in. Ensure there is a small gap between clusters to avoid clumping.
Secure the Clusters:
Gently press the cluster in place, making sure it adheres securely. Hold it in place for a few seconds to allow the adhesive to set.
Repeat the Process:
Continue applying lash clusters until you achieve your desired lash fullness and length.
Trim if Necessary:
If the clusters are too long or don't blend well, you can trim them with small scissors.
Adjust and Fill Gaps:
After applying all clusters, inspect your work and adjust any lashes that may not be perfectly aligned. Use a cotton swab and
some makeup remover to correct any mistakes without damaging your natural lashes.
Final Touches:
Once the adhesive is fully dry, you can curl your lashes and apply mascara if desired. Be gentle when curling, and avoid pulling
on the extensions.

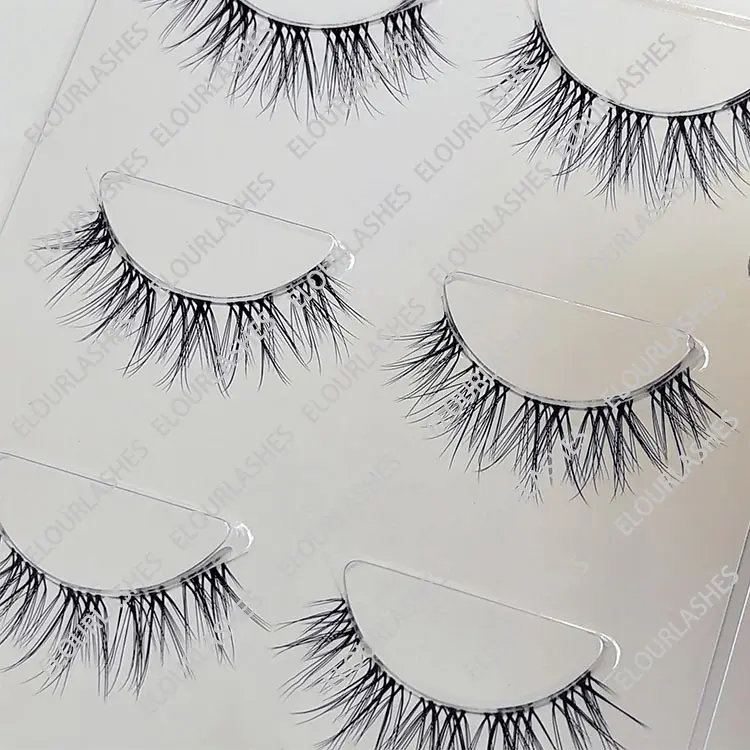
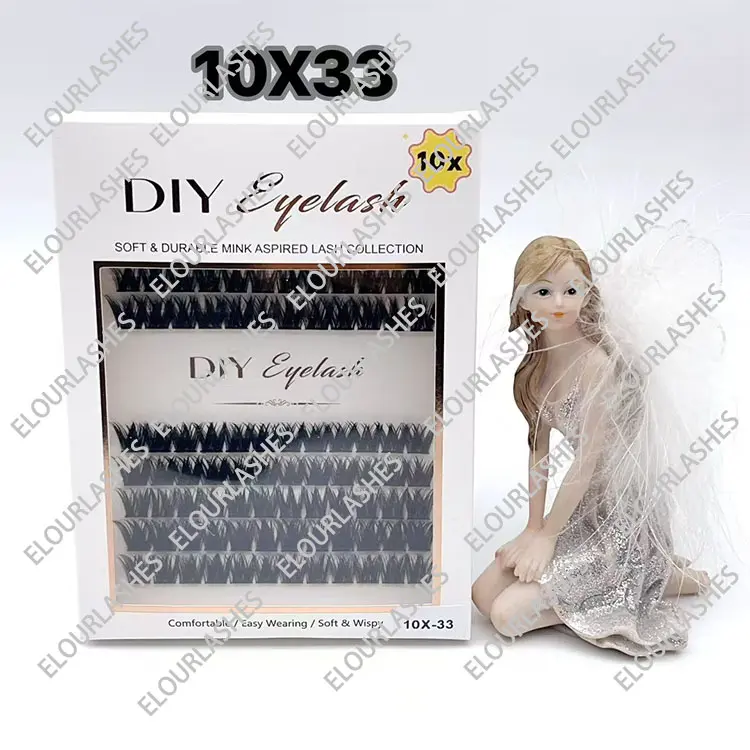
The DIY cluster lash extensions 10rows that pack,with same lash styles but different lash lengths in mixed from 8mm to 16mm.And the lashes styles can mixed in one pack,the lashes length also can mixed in one pack as customized.

Our DIY cluster lash extensions are with natural dense,do not fall apart at the root,easy to use.This DIY cluster lash is a kit,with 120pcs cluster DIY lashes and 2in1 lash bond and sealant,and eyelash tweezers,very convenient to use.Outside can customized your logo.

This tray of the DIY cluster lashes are with mixed lengths in 10-14mm,2 different DIY cluster lash extensions styles mixed in one tray.We do customized as need.

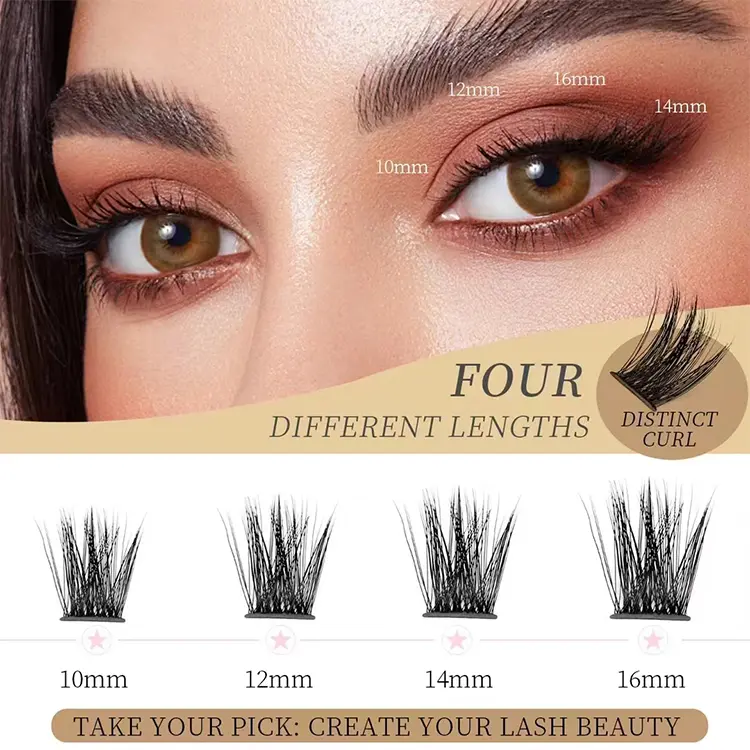
For the DIY cluster lash extensions,usually the length is from 8mm-16mm,and the each cluster lash band is about 5mm,and also can customized as need.And our DIY cluster lashes are 100% handmade,with fine way making,have a very beautiful looking.

The DIY cluster lash extensions are long lasting and curls are durable.And the DIY cluster lashes are reusable,the lashes give you a full,volume,but natural looking.

Our DIY cluster lash extensions use the bese PBT materials,each lash is with 3D-dimensional effect,charming your eyes/And our Diy cluster lashes are easy to clip,not loose the root,and many natural styles for your choices,and all the lashes can be reused.

Here are the grafting steps for the DIY cluster lash extesions,easy to use,easy to remove,long lasting and reusable.
And our DIY cluster lash extensions made by the best materials and have strict inspection system,to guarantee each of the lashes are good,and do not have loose root.
FAQs for the DIY cluster lash extensions:
1. What are DIY cluster lash extensions?
DIY cluster lash extensions, also known as individual cluster lashes, are pre-made clusters of eyelash hairs that can be applied
at home to enhance your eyelash volume and length.
2. Are DIY cluster lash extensions safe to use at home?
When used correctly and with proper hygiene, DIY cluster lash extensions can be safe. However, if applied improperly, they
can damage your natural lashes or irritate your eyes.
3. How long do DIY cluster lash extensions last?
DIY cluster lashes can last anywhere from 1 to 3 weeks, depending on the quality of the adhesive and your care. They will
eventually shed along with your natural lashes.
4. Can I wear mascara with DIY cluster lash extensions?
You can wear mascara, but it's generally not necessary, as the clusters already provide a fuller look. If you do use mascara,
choose a water-based, non-waterproof formula and be gentle to avoid damaging the extensions.
5. How do I choose the right cluster lash length and style?
You can choose different cluster lengths and styles to achieve your desired look. For a more natural appearance, use shorter
clusters toward the inner corner of your eye and longer ones toward the outer corner.
6. How do I remove DIY cluster lash extensions?
You can remove them using an oil-based makeup remover or specially formulated eyelash extension adhesive remover. Be
gentle when doing this to avoid damaging your natural lashes.
7. Can I reuse DIY cluster lash extensions?
It's generally not recommended to reuse DIY cluster lashes as the adhesive and lashes may lose their effectiveness. It's safer
and more hygienic to use new clusters for each application.
8. Can I shower or swim with DIY cluster lash extensions?
It's best to avoid exposing your cluster lashes to excessive moisture, especially in the first 24-48 hours after application. Water,
steam, and oils can weaken the adhesive.
9. What should I do if a cluster lash falls out prematurely?
You can use the same adhesive to reattach a fallen cluster, but be careful not to apply too much glue. If multiple clusters fall
out, it's a sign you need to be more cautious with your extensions.
10. Can I sleep with DIY cluster lash extensions?
It's generally not recommended to sleep on your face when you have cluster lash extensions, as it can lead to premature
shedding. Try to sleep on your back or use a lash-friendly sleep mask.


